
Introduction
Petrol engines used in lawnmowers, tillers, garden tractors require regular maintenance (such as changing oil, air cleaner, etc) every 20-30 hours of runtime. This app helps tracking engine runtime in manual mode, when user initiates start and stop events or in semi-automatic mode by "listening" to the noise. Once engine's runtime reaches a point from a predefined maintenance schedule the app indicates this event on the screen. The indication will remain until explicitly cleared via a menu command. Visit app page in PlayStore
App Screenshots
User's Manual
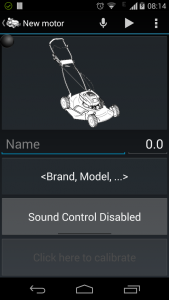
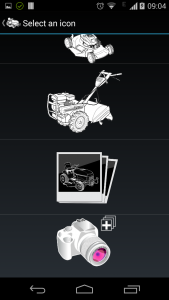
1. Creating a new motor
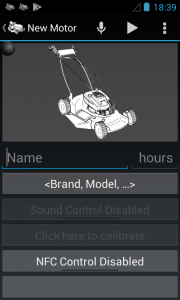
When you first start the app, it will bring you to New Motor screen automatically (see screenshot on the left). Further on tap plus in the main screen menu to add a new motor.
There are no mandatory fields on this screen, but you need to enter at least something (name, initial runtime, image, etc) to make this motor created.
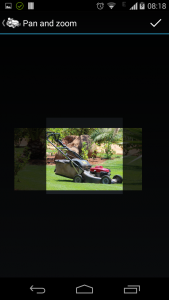
2. Assigning an image
To change the default image, tap on the image and select alternate image from the list (see screenshot on the top-right). Also on this screen you may open phone's gallery or start camera app for making a photo in your own. In both these cases you will be directed to Pan-&-Zoom screen for adjusting the photo to required size (see screenshot on the left). Once you finish with adjusting the photo, it will appear in the list and you will be able to select and assign it to the motor (see screenshot on the right).
3. Calibrating the engine
If you plan to control engine runtime in semi-automatic mode you should enable sound control and calibrate the phone for your engine.
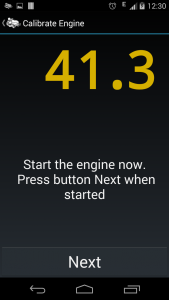
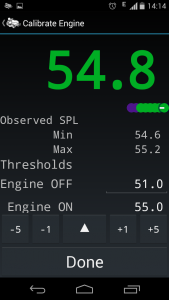
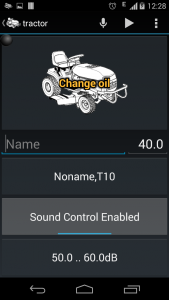
For this you will need a short run of your engine. Therefore get close to the engine and be prepared to start it when asked. Then tap "Sound Control Disabled" to enable the sound control (if not enabled yet). If there were no calibration yet, the app will open calibration screen automatically, otherwise just tap threshold button below the "Sound Control" button. On the first step app shows a screen with current sound pressure level (see screenshot on the left) and waits for engine to start. When the engine is started, sound pressure level exceeds threshold and app opens next screen (see screenshot on the right). If this does not happen automatically with engine start, tap button "Next". Then position motor or yourself for normal operation and let the engine to run for some time in normal mode. Usually 10-30 seconds is sufficient. When done, tap middle triangle button to set the thresholds and shut the engine. Sound Pressure Level indicator should become shortly red and then yellow. If this happens the motor stop is detected normally and no adjustments needed. If indicator keeps green color, you may need to increase Engine OFF threshold. Tap on the "Engine OFF" label and then on +1 or +5 buttons or just correct the threshold level by taping new value. Tap Doneto return on the Motor Editor screen.
4. Assigning NFC Tag
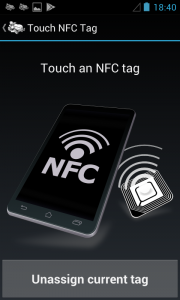
On the phones with NFC support the app will show additional controls for NFC tag. If you wish to use NFC tag for stating or selecting your motor, attach an NFC tag to you lawnmower. When selecting a surface mount NFC tag, take into account what surface it will be mount on. To be mount on metal surface the tag should have ferrite barrier layer. To enable NFC control in the app, tap "NFC Control" button (see screenshot on the left). If the motor has no tag assigned yet, the app will show "Touch NFC Tag" screen (see screenshot on the right). Alternatively you may open this screen by tapping button with the tag ID (see this screenshot). Then touch the tag with your phone. If the scan is successful, the app closes the current screen and shows tag ID on the "Edit Motor" screen (see this screenshot)
When operating the motor state will be triggered on a scan of the NFC tag. Motors with sound control off are started or stopped, while motors with sound control on are selected/deselected.
5. Setting up maintenance schedule
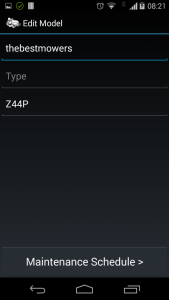
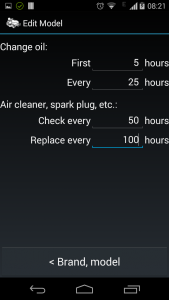
On the Motor Editor screen tap <Brand, Model...> button. The app will open Model Editor screen (see screenshot on the left). Fields on the first screen are just memo, you may leave it empty. Tap button "Maintenance Schedule", the app will open Maintenance Schedule screen (see screenshot on the right). Enter values relevant to your engine. Please refer to engine owner's manual for exact numbers. Tap Back to return to the Motor Editor screen. On the Motor Editor screen tap Back to return on the main screen. Now you setup is ready.
6. Operating the app
Manual start.
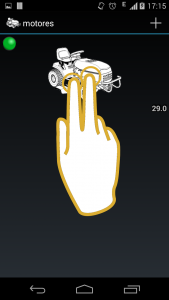
On the Main screen: tap and hold an engine image with two fingers until state indicator becomes green (see sceenshot on the left)
On the Motor screen: tap Play menu button
With NFC: unlock the screen, touch the NFC tag

Manual stop.
On the Main screen: tap and hold an engine image with two fingers until state indicator becomes gray
On the Motor screen: tap the Stop menu button
In the notifications: tap the Stop button
With NFC: unlock the screen, touch the NFC tag
Activating semi-automatic control:
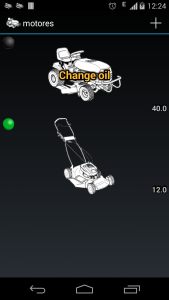
On the Main screen: tap and hold an engine image with one finger until state indicator becomes yellow (see screenshot on the right.
On the Motor screen: tap the Microphone menu button
With NFC: unlock the screen, touch the NFC tag
| Off | |
| Engine selected for sound control | |
| Engine start detected | |
| Engine runs | |
| Engine sound not detected |
Deactivating semi-automatic control:
On the Main screen: tap and hold an engine image with one finger until state indicator becomes gray
On the Motor screen: tap the Microphone Mute menu button
With NFC: unlock the screen, touch the NFC tag
Clearing Maintenance Alert
On the Motor screen: tap the Maintenance Done menu item
Deleting a Motor
On the Motor screen: tap the Delete Motor menu item
Deleting a Motor Image
On the Image List screen: swipe the image slowly to the left until it is darkened and then release
7. Engine state indicator
Each motor in the list has an Engine state indicator, see legend on the left.
Post a Comment